Subscribe to our Newsletter!

Showing posts with label holiday. Show all posts

Thursday, March 17, 2016

Happy St. Patrick's Day!

Thought I'd share this for Throwback Thursday AND St. Patrick's Day!  These photos are some of my favorites.  I think it's because I love spring when everything begins to wake up from it's winter slumber :)  Enjoy and Happy St. Patty's Day!!


I don't know if it's because I'm so o-v-e-r winter or what but I'm just loving these colors right now.  I began my spring decorating with some of my blue and white dishes as you remember from this post.  Yesterday, we went for a walk to the old farm next door and collected these beautiful, bright yellow daffodils.  Add those to the blue and white and it's gorgeous.  Now, with St. Patrick's Day approaching, I picked up a pot of shamrocks at Kroger.  The vibrant green just makes the whole thing over the top WOW!  


The Latin name for shamrock is oxalis acetosella.  

This plant family also includes sorrel.  If you're a Seven Brides for Seven Brothers fan, you'll know that sorrel makes "real nourishing soup."  :)


Look at that yellow and green!  

I always thought a shamrock had 4 leaves...you know, a four leaf clover, luck o' the Irish kinda thing. Nope.  Shamrocks have 3 leaves.  Clover can have 4 or more.  Yeah, I googled that.


Vibrant yellow daffodils against the shamrock green.  

Did you know you can dry daffodils?  You can!  Just like hydrangeas, they will slowly over time become paper like but will retain some of their yellow color.  And like hydrangeas, they will be somewhat fragile.  Once mine are dried, I remove their stems and just used the blooms as a bowl filler or even carefully added to potpourri.  (Does anyone still use potpourri?)


Since it's St. Patrick's Day, I pulled out my old Atlas "Good Luck" jar for the daffodils.  

It's a little hard to see but this jar has a four leaf clover and the words good luck on it.  I can't remember where I found this jar but it was more than likely a thrift store or yard sale years ago.


Thanks for stopping by and God bless!
Angie

Sunday, March 13, 2016

Beautiful Easter Tablescape Combining China and Casual Dishes

Hello!  I know I've been missing from the blog world lately.  

beautiful easter tablescape with herend china and juliska dishes


You see, I began a new job a few months ago and it's been a little crazy just trying to juggle working outside the home, continuing to sell real estate, homeschool (although my 11th grader is handling most of that on her own with dual enrollment), and keeping up my home.  

I don't know how some women do it!  

Now that I'm beginning to adjust, I want to share with you all what I'm doing.  I'm working with a home decor store that also offers full design services.  It's a dream come true, honestly.  

beautiful easter tablescape with herend china and juliska dishes


I posted in the past about how God gives with me a "word" for the new year.  Well, last year's word was "dream" and so I did.  

beautiful easter tablescape with herend china and juliska dishes

My dream was to work in the interior design field.  To be able to help others create a home that they love.

beautiful easter tablescape with herend china and juliska dishes

So, acting on my word of the year, I dreamed.  I dreamed big.
And God delivered.  He's just so amazing like that!

beautiful easter tablescape with herend china and juliska dishes

I'll be posting about projects that we're working on for clients as well as the beautiful items we have in the store.  

If you're in the middle Tennessee area, stop by and see me at The Peddler in Murfreesboro.  It's a great place to get inspired!


beautiful easter tablescape with herend china and juliska dishes

The photos in this post are of a tablescape we made by mixing beautiful Herend china pieces with some Juliska casual dishes.  You can easily achieve the same look by using your own china and everyday dishes OR pick up a few from the thrift store!  

I have to confess that we do use a lot of melamine in my house but I'd love to break that habit and pull out the fancy stuff.  

What'd you say?  Let's all pull out that wedding china and bring "fancy" back!!  

I'd love to see your tablescapes.  Post them in the comments section for us to enjoy!

God bless and thanks for stopping by!  AND, thanks for sticking with me these past few months!

Angie


Friday, October 23, 2015

An Old-Fashioned Tradition...and a Giveaway!

It's late October and, like me, some of you are beginning to think about your Christmas cards.

old window chalkboard calendar, spain hill farm blog


I love receiving old fashion style (aka non-virtual) holiday cards from family and friends.  
I have a few that still include a letter sharing all that has happened in their family during the past year.

brass stencils, joy, spain hill farm blog


There are lots of ways to display those tangible tokens of love and friendship.
I've created a Pinterest board here if you need a few ideas.

snow globe picture, mini vw bus, christmas decor


It's such a sweet tradition that, so far, hasn't totally been absorbed into the virtual world.  Hey, I'm all about the convenience of online but sometimes old-fashion ways are refreshing.

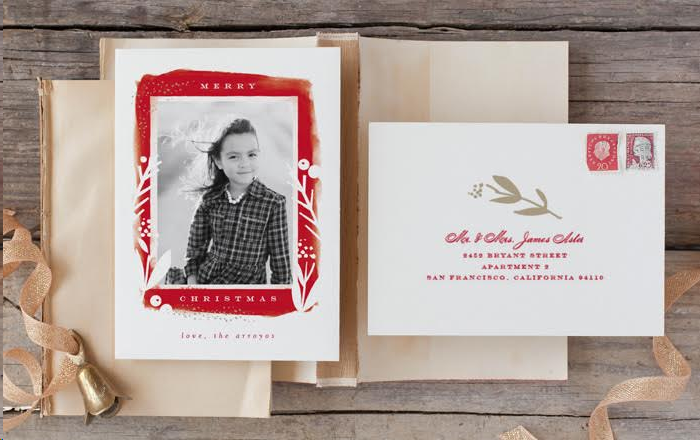
That's why I'm partnering with minted.com to bring you a $50 giveaway to use on their website.  The ease of online ordering and the beauty of a special, personalized holiday cards to mail to family and friends.

Now these aren't just your ordinary holiday cards.  Minted is known for its high-quality paper and printing. Minted’s Signature paper is thick and luxurious with a creamy cotton texture, and has been optimized for photo printing. You can also choose 100% recycled paper, Pearlescent paper which adds a subtle shimmer, DoubleThick paper or even TripleThick paper. Minted also offers 9 unique die-cut shapes. A variety of backer options allow you to add additional photos, text, and customization options to your holiday card.


Need a little more information about minted.com?  Let me share with you just how special they are!

About Minted: 
We believe that great design lives and thrives in the hands of independent artists that people do not have access to through traditional retailers. Minted uses technology to allow consumers to discover great creative talent, making Minted a place where artists can learn, gain exposure, and build their businesses. Minted is a design marketplace. We source creative content from a global community of independent artists, then sell the best content in the form of art, home décor, and stationery, directly to consumers. An early pioneer of crowdsourcing, Minted has held art and design challenges monthly since April 2008. Challenges are open for both submission and voting, the 'crowd' curates Minted's product selection by rating products, and Minted utilizes analytics to evaluate votes.

Now, who's ready for a giveaway!?

To enter the contest for the $50 giveaway, simply visit minted.com and then comment below with the holiday card you'd love to send this year!

The winner will be notified via email with their $50 coupon code.


a Rafflecopter giveaway


Tuesday, June 30, 2015

5 Great Patriotic Ideas for Holidays and Everyday


This weekend we celebrate the 4th of July, the USA's birthday!  What better time than to share these 5 great decorating ideas for your home, your porch, and even your backyard.


Summer is the best time for eating outdoors.  Why not set up this red, white, and blue tablescape to enjoy in your backyard?!  You can read the full post on it HERE.

patriotic tablescape, mason jars, red white and blue, Ralph Lauren sheet


How about a little Americana?  Painting the Stars and Strips on a piece of old fencing or pallet boards looks great!  Hang it on a wall in your home or outside on your porch.  This one sold at a charity auction last fall.

painted American flag on old barnwood

Not into DIY painting?  How about framing and hanging a real flag?  This Tennessee flag along with many others were on display at the Nashville Antiques and Garden Show earlier this year.  Loved this booth.  I'd love to have a room like this!


Antiques and Garden Show, framed flags and blueprints

Now, this next one is the easiest of them all but it may be my favorite.  I placed an old red and white bird house (built by my husband's grandfather many years ago) on an old metal stool and added two small American flags.  This is currently by my front door.  You can see the whole front porch HERE.

vintage birdhouse with red roof and American flags

And, last but not least, painting Old Glory on a piece of metal roofing.  A rusty piece, of course!  I hung this one above the door to our shed.  The full tutorial is HERE.

old metal roofing painted as American flag


There are so many things you can do to add a patriotic feel to your decor or table.  Try fresh strawberries in a blue transferware bowl!  

How do you decorate for the 4th of July!?  I'd love to hear!!

Thanks for stopping by and God bless America!

Angie

Here's one to PIN now, REMEMBER IT later!

5 great decorating ideas for patriotic holidays, red white and blue


Sunday, May 24, 2015

Memorial Day Appreciation

Happy Memorial Day!

Patriotic, Memorial Day, 4th of July, red white blue old bird house on front porch
I hope you're enjoying your holiday weekend.  I do want to take this time to say THANK YOU and to remember all those who are serving, that have served, and the family of those brave individuals!  


Wednesday, April 22, 2015

Family Recipe Swap: Mamaw's Chicken and Dumplings


Whether you call her Mamaw, Grandma, Nana, or Gigi, you have to admit grandmothers are pretty special and so is their cooking!  Today, I'm participating in a blog tour with bluwaterlife, The Crowned Goat, 2 Bees in a Pod, and Concord Cottage as we celebrate moms by sharing our favorite family recipes.  

Growing up, we called my mother's mother, Mamaw.  My mother has taken on that name from her grandchildren too.  And, let me tell you, these two have made some incredibly delicious dishes in their days!  Today I'm sharing my Mamaw's famous chicken and dumplings...sort of.  I don't have the special touch that she added to hers that made them so flavorful.  Perhaps it was the fact that she used a lot of items fresh from their farm or the fact that she would cook a whole chicken, make her own stock, and her own dumplings from scratch.  Yep, that's probably it but I will say, these chicken and dumplings, inspired by her recipe, are pretty doggone good too!


Amazing chicken and dumplings recipe


There is a printable and Pinnable recipe at the end of this post but for now, let's get on with some of the basics.


I use 1 pound of skinless, boneless frozen chicken breasts, boil in about 3 cups of water and 16 oz. of chicken stock, adding poultry seasoning, salt, pepper, and butter.  I put these on the stove about 3 hours before dinner and just let them cook on a slow simmer.  You want the chicken to pull apart quite easily.


Once the chicken has boiled for a couple of hours, I used two forks to shred the chicken.  I did this while still in the pot but you can remove it and add it back in.  After the chicken is shredded, add 1 can cream of chicken soup and 2 cups of half and half (I know! Just try to not think about the calories) to the pot.  Stir until the soup is incorporated well.  Next, taking about a cup of the liquid from the pot, pour it into a dish and add a couple tablespoons of cornstarch.  Whisk until the lumps are gone and add back to the pot.  


Next, the tortilla strips (aka dumplings) go in.  I use a pizza cutter to make the strips.  Add the strips into a ziploc baggie with about a half of a cup of flour and shake.  Add the flour-coated strips to the chicken pot and gently push into the stock.


We're almost done!  I let this simmer for about 15 minutes on medium high, watching carefully.  This will allow the stock to thicken from the cornstarch and flour.  

Now, we're ready to eat!!  Be careful...chicken and dumplings are hot!  


chicken and dumplings recipe


Be sure to continue our Family Recipe Swap by visiting my friends at:


Thanks for stopping by and God bless!
Angie


Sunday, March 29, 2015

Beautiful Coffee Filter Flowers

beautiful coffee filter flowers diy project


I love fresh cut peonies for the home.  Problem is...I can't grow peonies!  Having 8 acres, you would think I could find a spot that they would love and thrive in.  So far, I haven't found it.

However, I came up with this easy to make "peony" using coffee filters and washable markers.  They are a quick DIY project.  The hardest part is waiting for them to dry!

beautiful coffee filter flowers diy project

beautiful coffee filter flowers diy project


Here's what you'll need:

1 package of white coffee filters
washable markers in the color of your flower choice
craft glue
natural peat pots
burlap ribbon
scissors
a paper plate
a shallow bowl

To begin, grab about 10 filters (doesn't have to be the exact amount) and cut the ridges off of the filters.  You don't even have to be exact in cutting the same amount off of each.  Cut some short and some long.  This will make the petals of the flower.

beautiful coffee filter flowers diy project

Next, take the washable marker that you've chosen for your flower color.  Color (like a 2 year old) around the top of the filters.  You don't have to separate the stack.  Just color the tops of the inside filter and the outside filter.  The color will bleed through to the others.

beautiful coffee filter flowers diy project

I used a dark pink and a purple for this color.  They will bleed into one beautiful color as we go along.  No worries ;)

Fill the bowl with about an inch of water.  (Ignore the orange color in the photo...took the pic after making the orange flower.)

beautiful coffee filter flowers diy project

beautiful coffee filter flowers diy project

Now take the stack of filters with the colored edges and dip the tips into the water.  Hold it there for about 5 seconds so it will absorb water.

beautiful coffee filter flowers diy project
 Look at those colors beginning to bleed...beautiful!
beautiful coffee filter flowers diy project

Now for the hard part.  Waiting.  Place the stack of wet filters upside down on a plate and allow to dry.  It may take a few hours.

Once they are dry, pull the filters apart and pinch each filter together at the bottom.  Do this to each filter EXCEPT ONE in the stack.  You will keep the last one to glue the others into.

beautiful coffee filter flowers diy project

beautiful coffee filter flowers diy project

After you've pinched each of the filters, take the last one and begin gluing the others into the center.  I basically just put a glob of glue into the center of the last one and added the pinched filters one by one.  Pinch them together once they're all in and you should have your "peony" bloom!

Now, I decided I wanted to use these cute peat pots that I picked up at the DG (less than $2 for 8) to hold my flowers.


Before adding the bloom, let's dress the peat pot up with some burlap ribbon and a bow.


Wrap a length of the ribbon around and glue.  Since the pot is tapered, it won't lie flat unless you angle the ends up.  Tie a burlap bow and glue to the peat pot.  To secure the bloom in the pot, run a bead of glue around the top edge of the peat pot and carefully mash the bloom in.

That's it!  Let's see how they look.

beautiful coffee filter flowers diy project

beautiful coffee filter flowers diy project

beautiful coffee filter flowers diy project

beautiful coffee filter flowers diy project

beautiful coffee filter flowers diy project

Click on any picture to PIN IT for later!

Don't forget to come back tomorrow for the Something To Talk About Link Party!!  Incredible projects being shared each week!

Thanks for stopping by and God bless!
Angie


I'm linking here:

RAIN ON A TIN ROOF    THE STYLE SISTERS    JENNIFER RIZZO    HOME STORIES A TO Z
FROM MY FRONT PORCH TO YOURS    COMMON GROUND    HAVE A DAILY CUP OF MRS. OLSON
COASTAL CHARM'S NIFTY THRIFTY TUESDAY    FRIDAYS UNFOLDED   FEATHERED NEST FRIDAY
UNDER THE TABLE AND DREAMING    A DELIGHTSOME LIFE      DIY SHOWOFF      ART IS BEAUTY
CLEVER CHICKS BLOG HOP   IT'S OVERFLOWING   THREE MANGO SEEDS    ELIZABETH JOAN DESIGNS

Thursday, March 19, 2015

Easy Burlap Flower Wall Decor


easy-burlap-flower-wall-decor

Like most of us, I was seriously having spring fever last week.  Changing up decor, packing away the winter items.  That's when I came up with the idea of making a large burlap flower to hang on my mirror in the family room.

This is like crazy-easy and you may have the supplies on hand.  Here's what you'll need:

11 feet of burlap ribbon in the petal color of your choice (mine's white)
3 feet of burlap ribbon in the center color of your choice (mine's yellow)
   (can be found here in various colors on Amazon) Jute Ribbon 4"X 10 Yards-Red
glue gun
glue sticks
9 inch cardboard circle or 9 inch disposable plate for the backing
paperclip for a hanger
scissors


For the petals, cut the ribbon into 6 inch strips.  You should have a total of 22 strips.  Next, fold a strip in half so that the finished edges of the ribbon are together.  Beginning at the bottom, cut a curved shape to form a petal (much like cutting a heart from a folded piece of paper).


Once you have the petal shape cut out, use the glue gun to make a gather at the bottom of each.  Pinch the bottom (straight edge) of the petal and put a dot of glue into the fold to make it hold.


Once you have all 22 petals finished, you can begin gluing them to the paper plate or cardboard.  Make 2 rows of petals, 13 petals on the outer row and 9 on the inner row.  

easy burlap flower wall decor

easy burlap flower wall decor

For the center of the flower, begin by gluing down one end of the 3-ft. ribbon.  Then, every 4-6 inches glue down the ribbon again.  Seriously, you're just sort of wadding it up and gluing it down where it touches the plate.  It's easy and pretty forgiving so don't worry about mistakes.  

easy burlap flower wall decor

easy burlap flower wall decor

Here's the finished flower before I hung it on the mirror.

easy burlap flower wall decor

I used a small Command Strip hanger on the mirror and glued a paperclip to the back of the plate to hang the flower with.  (Sorry the photo is grainy.  It was late when I finished!)

The burlap flower is very easy and very quick to make.  I think these would be great for a party, shower, or even a rustic themed wedding.  Imagine the color combinations...yellow petals with brown center for a sunflower, bright colors with yellow center for a zinnia.

Thanks for stopping by and God bless!!
Angie

*Amazon link is an affiliate link to help bring The Altered Past to you :) Thanks!

I'm linking here:
RAIN ON A TIN ROOF    THE STYLE SISTERS    JENNIFER RIZZO    HOME STORIES A TO Z
FROM MY FRONT PORCH TO YOURS    COMMON GROUND    HAVE A DAILY CUP OF MRS. OLSON
COASTAL CHARM'S NIFTY THRIFTY TUESDAY    FRIDAYS UNFOLDED   FEATHERED NEST FRIDAY
UNDER THE TABLE AND DREAMING    A DELIGHTSOME LIFE      DIY SHOWOFF      ART IS BEAUTY
CLEVER CHICKS BLOG HOP   IT'S OVERFLOWING   THREE MANGO SEEDS    ELIZABETH JOAN DESIGNS