Subscribe to our Newsletter!

Showing posts with label dropcloth. Show all posts

Tuesday, February 5, 2019

Master Bedroom Sun Porch Makeover - Bohemian Style


sunroom sun porch 80s contemporary house spain hill farm

Remember this sun porch from our "new" house tour?  It's a small room off the master bedroom and the view makes one feel like you're in a tree house.


I knew the moment I stepped through the doors when viewing this house that this was going to be MY space.  My own little retreat to do my devotions, read books, take naps, hide from everyone.  Oops, did I say that out loud? :D

The first thing I had done was to hire a local window washing company to wash ALL the windows and skylights (there are 7..SEVEN in this house!)  It was actually more reasonable that I was expecting but I will say it may only be a once every year or two splurge.  


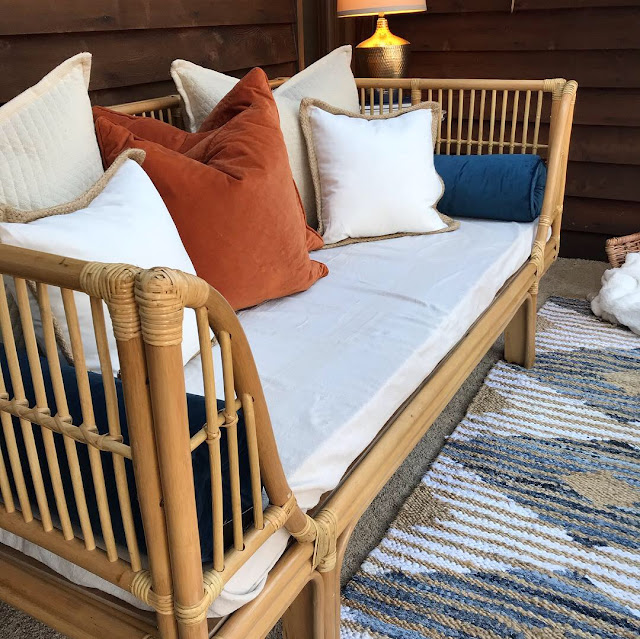
The carpet is fairly new so I didn't have to replace the flooring in this area.  So I began with selecting a few furniture pieces...mainly, this amazing daybed from World Market and the blue rattan chair and ottoman from Wayfair.

World Market rattan daybed sun porch makeover spain hill farm

Isn't it cool!?!  With the cedar siding exterior in this space, I felt a boho feel fit best with the wood.  And, my two favorite colors, blue and orange go right along with the boho look.

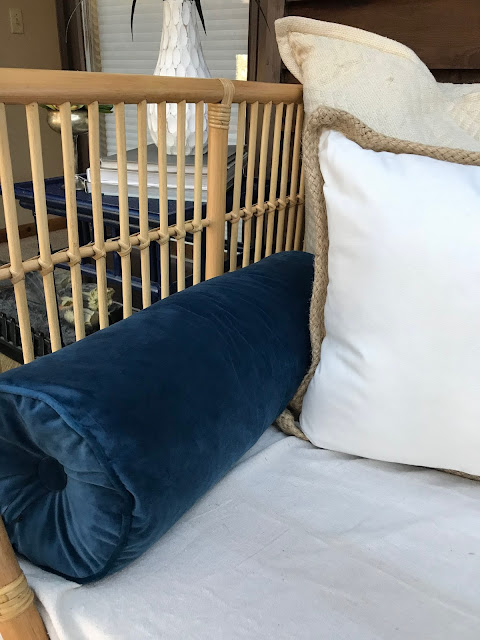
walmart blue velvet bolster pillows spain hill farm

I found these beautiful blue velvet bolster pillows at Walmart.  They were about $16 each and look like ones that cost much more.  The other pillows I snagged from around the house.


After the furniture and bedding were done, I just had to finish it off with the wall decor.  One inexpensive way to fill a large space is to do a gallery wall.  The wall behind the daybed is a filled with straw hats I purchased at thrift store.  They make a big impact for about $20 total.


The side tables were purchased at a yard sale years ago and the rugs are from a local discount store that sells overstock merchandise from Target and Amazon.  Lots of great deals but you have to visit often before they're sold out. 

So that's a wrap.  Now, I'm off to grab a mug of coffee and my favorite book.  You know where to find me if you need me!

Blessings!
Angie

Pin it so you don't forget it!

sun porch sunroom makeover 80s contemporary cedar siding home spain hill farm


Tuesday, March 4, 2014

Spring in Blue and White


We finally received a decent amount of snow this winter.  And, now I'm over it!  I'm ready to get on with spring.  I've pulled out some of last year's spring decor but it seems I'm going with a blue-white-yellow theme.  So far, I've only added a few things to the kitchen and living room area.  As soon as the temperature gets back in the 50's at least, I'll work on the front porch and deck.

Warning this post is a little photo heavy so grab a cuppa something to enjoy while you're here.


Some of my favorite blue and white dishes in a old brass planter.  


I've also added a glass with vintage silver and ivory handled flatware.  


Love the patina...fancy word for tarnish :)


I swapped out the bamboo tray that was on the bar table for my grandfather's old tool caddy.  I love the mix of the old rough wood with the silver and glass.  Cobalt blue tumblers, found at Goodwill for $1.99, were added for a punch of color.


An old calf muzzle, purchased from a yard sale, holds wine corks.


The silver punch bowl, ladle, and demijohns were all found at my favorite thrift store, The Bargain Center.  I've found SO many things there.  If you're ever in the Murfreesboro area, let me know.  We'll go treasure hunting together.


I didn't use a wreath on the mirror of the bar this season.  I let a couple sprigs of forsythia cascade over one corner.  I love forsythia bushes.  I planted a couple this past summer.  I hope they come back this year.


And, because I'm dying to get my hands in the dirt, I started the kale plants from seeds a few weeks ago.  We love kale broiled with a little sea salt and olive oil.  It's so good it rarely makes it from pan to plate.


Finally, what says spring more than a baby chick?  This little guy is so life-like he's fooled a few people.  We've actually raised chicks before and enjoyed it.  Now, since the girls are older and involved in so many activities, it's easier to just buy pullets and raise for eggs.  It's on my to do list once the temperatures stay warm.

I hope you've enjoyed the spring decorations I've added so far.  I'm linking the The Scoop's Mega Spring Linky Party HERE.  Be sure to check it out!


Thanks for stopping by and God bless!
Angie


I'm linking here:


STONEGABLE 

UNDER THE TABLE AND DREAMING


Saturday, October 19, 2013

Vintage Ticking and Dropcloth Runner


A simple table runner that works perfect for Fall or really everyday...vintage blue striped ticking and a dropcloth ruffle.  Months ago I came across some fabric remnants at the thrift store.  Included in the bundle were 3 different ticking pieces.  This blue striped ticking was the perfect width for a table runner but I needed to add some length for it to drape over the edges of the table.


Scrounging through my stash of fabric, I came across some extra pieces of a drop cloth.  They were leftover from my attempt to make slipcovers for our chairs in the kitchen.

NOTE:  There will not be a post on the slipcovers later.  Nor photos.  It's just too soon to talk about.

Back to the runner...I'm really not a seamstress.  I do own a sewing machine only because there is no driver's test to take before purchasing one.

However, no one was harmed and this project was pretty easy.

I made a simple hem stitch to the sides of the ticking for a finished look.  I do like raw edges in decorating but the raw edge on this old fabric was not attractive in any form.

You will need two pieces of the dropcloth, one for each end.  In figuring the width measurement of dropcloth to create the ruffle, I doubled the width of the ticking.  This will make a nice soft ruffle.  The greater the ratio of runner to ruffle, the fuller your ruffle will be.

I'm sure there is an official way to create a ruffle with the sewing machine but most of my projects follow anything but official methods.  My right brain doesn't always "play well with others" when it comes to listening to the left brain give instructions.  So, right brain comes up with its own version.  It's how we roll.

Creating the ruffle for right brainers - set your sewing machine stitch length to the longest setting.  Sew a straight stitch from one end to the other of the fabric. This is done before attaching the ruffle to the ticking.  You are sewing a straight line just on the end of the dropcloth.  Do not double back over your stitches.  Also, allow extra thread before starting and after finishing the stitching.

Once you clip the threads and remove from the sewing machine, simply hold one end of the threads and gently pull, working the fabric back toward the other end.  You can get the ruffles as tight or as loose as you choose.  Just be careful not to pull too hard and break your stitching.

Clear a mud?  I hope not.  Most of you probably know more about making ruffles than I do :)  The best part is if you don't get it right the first time, the stitches pull out easily and you just try again.


Repeat the ruffle stitching for the other piece.  Once you have both ruffles made, place one at each end of the runner, right side to right side.  Align the edge of the runner to the ruffle (and it will be kind of bunchy because of the ruffle stitching), then run a straight stitch from end to end.  You will want to double back on your stitches when you begin sewing and when you get to the end.  This will lock the stitches so that they don't come apart.

Now, once each end has been attached, give your runner a simple press over the seams with an iron.  Place on your table and admire your accomplishment!

Red ticking with dropcloth would be great for Christmas, Valentine's Day, Fourth of July, practically all holiday occasions.

I've had this one on my kitchen table for about a month.  It's our everyday table, where we eat all of our meals.  I like decorating the table we use because we actually get to enjoy it.

How do you decorate your everyday table?


Thanks for stopping by and God bless!!  I'll be sharing this project at the Stone Gable here:

Angie